
GreenLight simplifies and streamlines the process of creating, checking and exporting a set of files ready for translation.
Illustrated book publishers typically sell the rights for foreign editons of their books to other international publishers.
In order to reduce production costs, the original publisher handles the production and printing of the Co-Edition (aka Co-Ed) publication.
The Co-Ed publisher is responsible for the management and supply of the translated text.
The Co-Ed publisher receives a set of InDesign files from the original publisher and provides their text translations back as single colour print ready PDFs.
All text, including any images that are specific to their language (e.g. logos), must be in one colour – Black.
The printer then combines the black translation files with the common images to print a four colour (CMYK) job, whilst only changing the black plate for each language edition as part of a longer print run that reduces costs.
The CMYK printing technique uses the four inks of Cyan, Magenta, Yellow and Black. K stands for Key (apparently).
By combining various tints of these four ‘process colours’ in miniscule dots we achieve a wide range (gamut) of different shades of colours sometimes called 'four colour' printing.
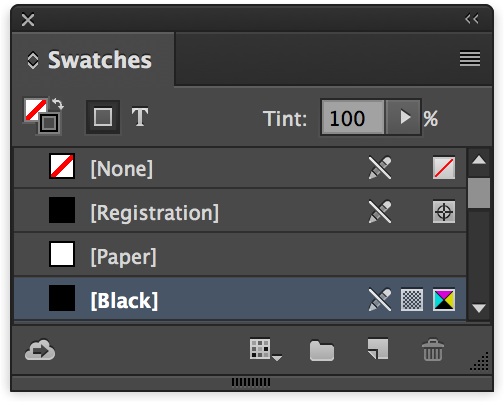
InDesign has a default Process Black swatch which can’t be deleted named [Black].
Inks can be mixed together to produce many colours. By adding a combination of CMY to 100% K it is possible to get even darker blacks for artwork, often referred to as Rich Blacks. But for Co-Ed publishing it is essential that we only use the process black, the K only black for translations.
By only using InDesign's [Black] for all translation text and translation images, therefore, we can be sure that we are using the required single colour black.
This applies to all text on a translation layer, either in text frames or on text paths, and also applies to any stroke (border) colours applied as well as the more common fill (solid) colour.
Any tint of [Black] from 1-100% is acceptable.
Avoid using 0% tints as this becomes white and can cause other production issues such as disabling overprinting.
Process Black using the InDesign default ‘[Black]’ is used for all language text:

Note: Text on covers and jackets is not restricted to black only and overprinting in this way.
With InDesign we have the ability to lift translation text onto a layer above the base artwork. In the early days of desktop publishing, before InDesign, we had no layers and had to resort instead to using a spot colour Text Black to identity the translation text.
Combining spot colour Text Black with the K in the CMYK artwork is a more complex and manual process which is more likely to cause production issues, needs more checking and proofing, and more often leads to errors in published books.
Some publishers to this day still use the Text Black spot colour technique even though there is no technical reason to do so. Circular Software can still support this older workflow but advises moving away from what is now seen as a more cumbersome approach.
InDesign has a preference to overprint 100% [Black] objects, which is enabled by default:

But, as this can be unwittingly changed by a user, a safer method is to set the overprint in all our images, objects and text on the page and so not rely on this setting.
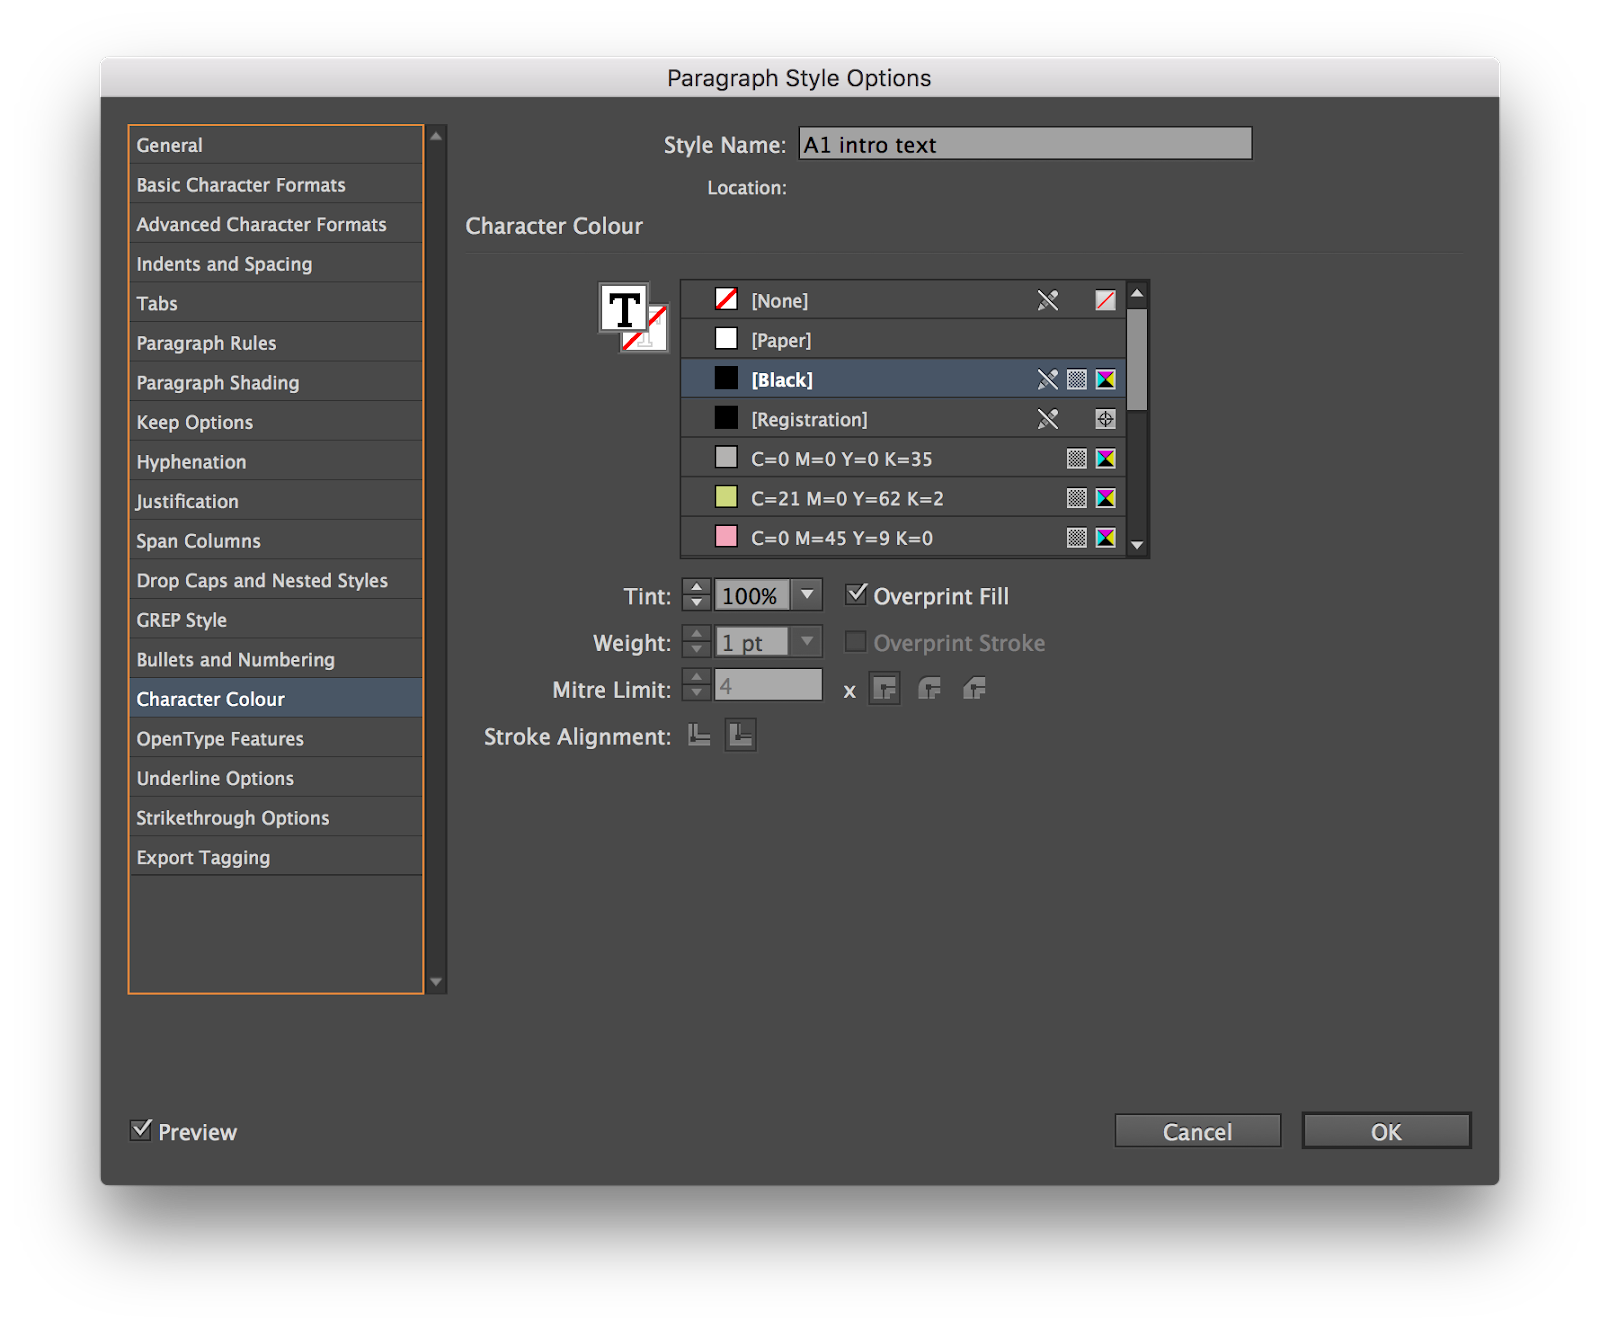
The easiest way to control overprinting is through using InDesign text styles InDesign Window menu > Styles > Paragraph Styles / Character Styles.
To do so, the Overprint check box(es) must be ticked in a style’s Character Colour settings, and can be applied to both Fill and Stroke colours.
The Overprint all Paragraph Styles tool in the GreenLight Print Production Tools panel GreenLight Tools menu > Print Production Tools quickly sets all Paragraph Styles to overprint.
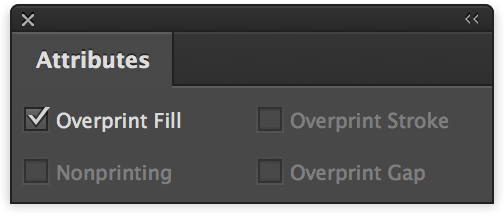
Overprinting can be applied to selected text using the InDesign Attributes panel InDesign Window menu > Output > Attributes
This is invariably a laborious task and open to human error, but additional GreenLight tools can streamline the process.
A host of tools in the GreenLight Co-Editon Tools panel GreenLight Tools menu > Co-Editon Tools can quickly set the requisite text layer objects, images and text to overprint.

By using InDesign layers we can easily separate the translatable objects including text frames, translation images, text wrap and objects from the base artwork.
Traditionally all the base artwork is placed on a layer named CMYK although in some workflows the colour mode used may differ – e.g. RGB.
When using GreenLight the naming of the TEXT layer includes the language used – e.g. TEXT-DE for German. GreenLight prompts the user to choose the language from a list of internationally recognised codes and checks the naming of this layer matches the document name.
When more than one language is present in the same InDesign document then multiple language layers may be used. Some publishers prefer to have US English TEXT-US and UK English TEXT-UK layers in the same document.
The TEXT layer is placed above the underlying base artwork in the Layers panel stacking order and overprints.
Where necessary, any drawn objects (e.g. annotation lines) and placed images (e.g. logos and artwork containing stylised words) that are specific to the foreign edition must be placed on the text layer.

These images and objects need to follow the same conventions as the text, i.e. [Black] only, and set to overprint.
All images used on the text layer must use the InDesign default colour [Black] swatch. No other colours or colour modes (such spot colours, RGB, Pantone or LAB) should be used.
Bitmap images should be saved as mono Black and White (B&W) images using either TIFF or PSD as the file format.
Any tint of [Black] from 1-100% is acceptable. Avoid using a 0% tint as this does not work! This becomes output as white and instead of overprinting will knock out underlying artwork and so disrupt the Co-Ed process.
The InDesign default [Black] is recommended for all text layer images.
As with text, all images on the TEXT layer are set to overprint.
Bitmap images (shown as ‘Black and White’ images in the InDesign Links panel) and Grayscale images can be set to overprint within InDesign.
To apply overprint to pixel images, select the content of the image frame rather than the frame itself using the InDesign Direct Selection Tool.
Apply overprinting using the InDesign Attributes panel InDesign Window menu > Output > Attributes
For placed vector images on the TEXT layer, overprinting is set beforehand using the Illustrator Attributes panel Illustrator Window menu > Attributes.
In a similar way to InDesign, select the Illustrator artwork with the Direct Selection Tool and click the checkbox to apply Overprint Fill and/or Stroke

Note: This only applied to images on the translation TEXT layer. Images on all other layers have no such colour and overprinting restrictions.
GreenLight has automatic checks available for Co-Edition images.
Co-Edition text is always on a layer above the base artwork, but can be given the appearance that it is flowing around the base images to give a less formal structure and is a commonly used creative design feature.

By enabling the precise positioning of text for each translation, we can allow words to be finely repositioned for each language layer as required.
Because text wrap objects are unique to each language, we add them to the TEXT language layer in question.
The InDesign colour swatch [None] is recommended for the Fill and Stroke colours of text wrap objects.
Also, as the base CMYK layer may be adapted or even removed, we must avoid the use of text wraps for any images on that layer.
GreenLight can check that text wrap objects are solely on the TEXT layer, and also check the colouring used.
A useful GreenLight tool exists to remove the text wraps applied to objects on other layers and recreate them correctly on the TEXT layer: GreenLight Co-Editon Tools > Lift text wraps to text layer.
The Co-Edition process is a physical printing technique, as described in the steps above, whereas transparency is an on-screen effect that ultimately requires a process of flattening onto the underlying artwork (or white) to emulate the effect.
In short, we don’t print transparency(!) and the flattening process has been found to affect the CMY colours in the base artwork. e.g. leaving a gap in the shape of English words underneath a French translation.
The benefits of Co-Edition publishing (both economically and in terms of workflow) mean however that we must compromise and disallow transparency effects on the TEXT layer.
This restriction only applies to the TEXT layer(s) however, and all artwork on underlying design layers and their placed artwork can still utilise transparency, drop shadows, and blend modes etc.
We hope the panel below will help you remember these essential steps!

GreenLight has checks to spot any erroneous transparency on the TEXT layer.
For GreenLight PRO users, a Co-Edition checklist can be selected from the GreenLight Set-Up menu > Set Active Checklist.
For GreenLight Custom users, the relevant Co-Edition checklist is selected automatically based on the name and workflow status of the document.
There are two ways to run a GreenLight checklist on a document:
The quickest way is to simply click the Mini Panel, which is shown on launching GreenLight and can be found under the GreenLight menu > GreenLight Mini Panel

Alternatively you can choose GreenLight Run menu > Run GreenLight on document
Please refer to the Checking a document with GreenLight tutorial for more on how to use GreenLight to quickly identify and fix any Co-Edition file issues.
For GreenLight PRO and GreenLight Custom users, choose GreenLight Tools menu > Co-Edition Tools.

GreenLight Tools are the only time that GreenLight will change your document. The GreenLight user chooses if and when to run these tools.
InDesign items can be have their visibility switched off. GreenLight will still check hidden items and flag any issues. This tool quickly deletes any hidden objects on the TEXT layer of the current document that have their visibility switched off.
Duplicating TEXT layers can reapply InDesign master pages and introduce unwanted objects to be placed on the new layer. This tool exactly duplicates the current text layer and is suitable for preparing files for translation.
It is a requirement to place InDesign text wrap objects on the TEXT layer. This tool looks for text wraps on objects on the CMYK layer, removes them and then recreates them on the TEXT layer.
All text on TEXT layers is to use the InDesign [Black] colour and be set to overprint. This tool applies [Black] fill colour and overprint fill to all text including all ‘white space’ – e.g. spaces and returns.
All text on TEXT layers is to use the InDesign [Black] colour and be set to overprint. This tool applies overprint to all already stroked [Black] text.
All [Black] objects on text layers are to be set to overprint. This tool applies overprint to all [Black] objects, e.g. lines and tint panels on the TEXT layer.
All [Black] objects on TEXT layers are to be set to overprint. This tool changes all [Paper] filled text to overprinting 1% [Black].
All [Paper] objects on TEXT layers are replaced with 1% [Black] and set to overprint. This tool applies overprint and 1% [Black] to all [Paper] objects on TEXT layers e.g. lines and tint panels.
This tool is provided to help suggest suitable file names that match the requirements of the GreenLight Custom client.
With a Co-Edition document prepared and checked by GreenLight, a Co-Edition file package can be made.
This translation ready InDesign package contains the live TEXT layer, text wrap objects and all graphics on the TEXT layer, e.g. logos. All other artwork from the underlying base layers is combined, watermarked and embedded to provide trouble-free and secure positional files.
For GreenLight PRO users and GreenLight Custom users, a Co-Edition checklist can made by selecting the GreenLight Export menu > Export Translation Files. The exported package contains:
Adobe Fonts are not included by InDesign, although other fonts may be, depending on their format and policy of the GreenLight client.
A video covering this step is included below:
Find other tutorials on our Step-by-step Tutorials page.