
Combining files prepared for print or digital export with the translated text from foreign language versions
With an appropriately prepared InDesign document we can reuse common content – e.g. reading order, image regions and panels – and combine with the text of one or more languages.
As every InDesign object is identified with a unique id number, to reuse the ebook mark up added by GreenLight it is important not to replace objects – e.g. text frames – but instead to replace only the content from the source document inside the frames in the destination document.
This tutorial explains the steps to merge translated Co-Edition content into a pre-prepared document.
To be clear we will be working with two InDesign documents:
We recommend saving and renaming the UK document before starting this merging process.
As mentioned in the Establishing reading order for complex illustrated ebooks tutorial, there are two type of text layer:
Working with a layered UK document we can import the US text for both the display text layer and the live text layer.
Circular Software can supply Match_CoEd_Content a custom script to help with this task. This scirtpt requires these two InDesign documents to be open:
Tip: Use the InDesign Window menu > Arrange > 2-up Vertical to view both documents side-by-side.
With both the documents open (we will confirm which is the SOURCE document in the next step):
1. Double click the Match_CoEd_Content script and choose Step 1 in the dialog shown to start the process.
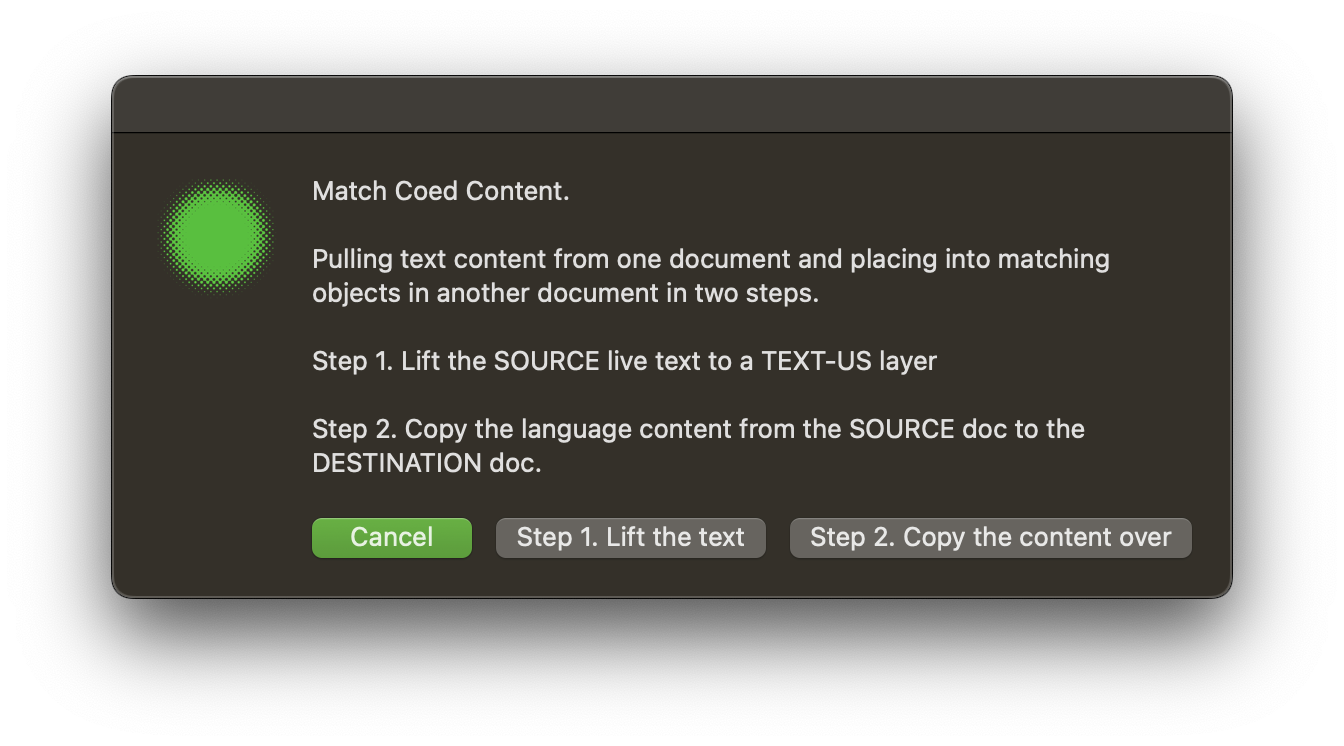
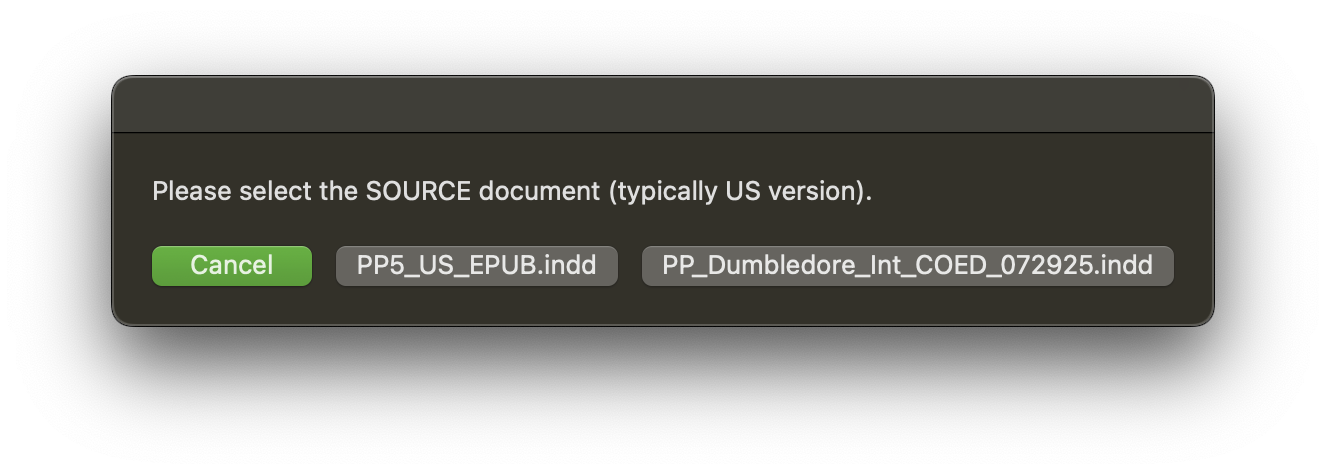
In the next dialog shown, select the SOURCE document.
The IDs of the text frames marked in the DESTINATION document are analysed and the corresponding frames in the SOURCE document processed:
Tip: Click the eye icon to the left of the TEXT-US and Display text - US layers in the Layers panel, to show or hide and quickly check the text is correctly postioned on these layers.
Check for text frame groups e.g. larger quotation marks around quote text. Ungroup these if found (InDesign Object menu > Ungroup) and run Step 1 again if necessary.
Following step 1, with the text frames positoned on their correct layers, the content should now be copied over from the Live text layer in the SOURCE doc to corresponding text frames in the DESTINATION doc.
This can be achieved by manually copy and pasting text between the corresponding frames of the two documents.
Note: It is important to copy the content of text frames, not the frames themsleves.
If using the Match_CoEd_Content custom script, text frames are selected in turn and content is copied and pasted from the SOURCE document to the DESTINATION document systematically increasing accuracy and speeding up the process.
Some manual adjustment may still be required e.g. frames with multiple and we recommend moving through the document to check spread by spread.
To copy content between documents using the script:

Where text is unable to be copied from the DESTINATION document – e.g. due to mixed paragraph formatting or empty paragraphs – then the script will highlight any problematic frames with a red fill colour and alert the user.
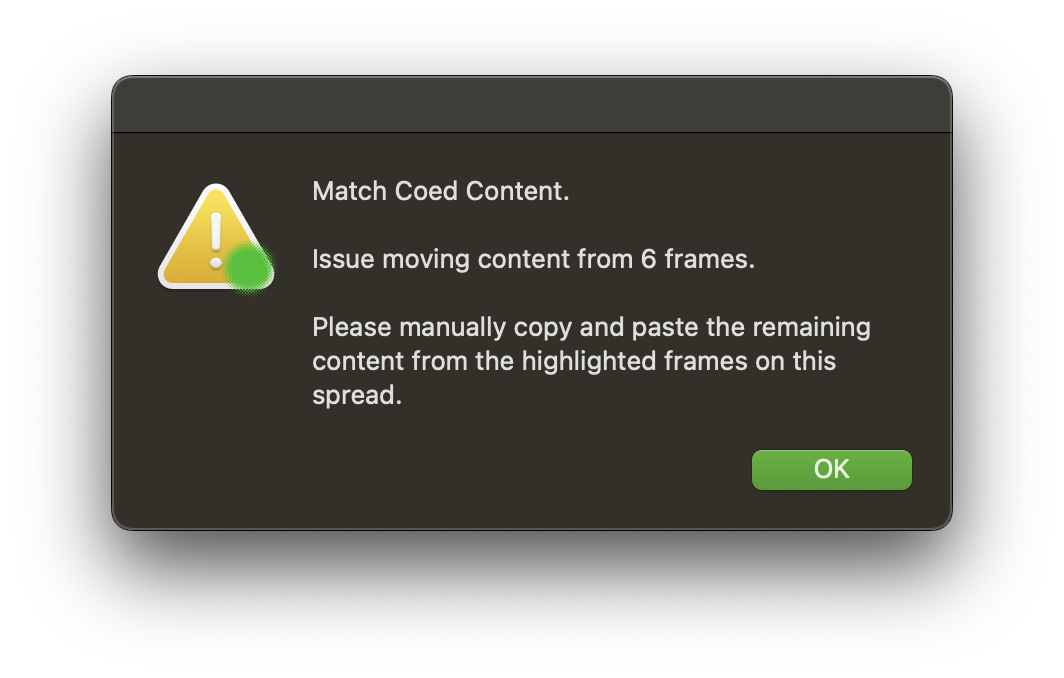
As the dialog recommends, any text from the highlighted frames should be manually copied and pasted between the documents.
To check and tidy up the newly-introduced text we recommend following the Live Text step in the Establishing reading order for complex illustrated ebooks tutorial e.g. to replace faux italics and unwanted hard returns.
Using existing image regions in the DESTINATION document enables them to update their descriptions with translated versions.
Follow the Image descriptions step in the Accessible Fixed-Layout ebooks tutorial for more information on setting up and naming a SIDD.
To create a new SIDD for translated image descriptions, duplicate the UK SIDD and name it with the ISBN that matches its language edition. The translated descriptions can then be entered and edited in SIDD.
GreenLight checks the ISBN in the GreenLight Book Info panel and matches the InDesign document to the SIDD using that same ISBN in its name.

After making the language specifc changes to SIDD, import the amended descriptions with the GreenLight Image Tools Panel > Import image descriptions tool.